Click on any image to make it bigger, all images copyright Corporate Photography Melbourne
One of the most important, if not THE most important, features of your LinkedIn account is your profile picture. If you are new to social media then finding the upload button can be a daunting scavenger hunt, but lucky for you I have prepared an easy to follow step-by-step guide on how to do just that!
1. In the top right hand corner of the page there should be your name and when you hover your cursor over the top of it a drop down menu should appear. Click on the Settings tab.
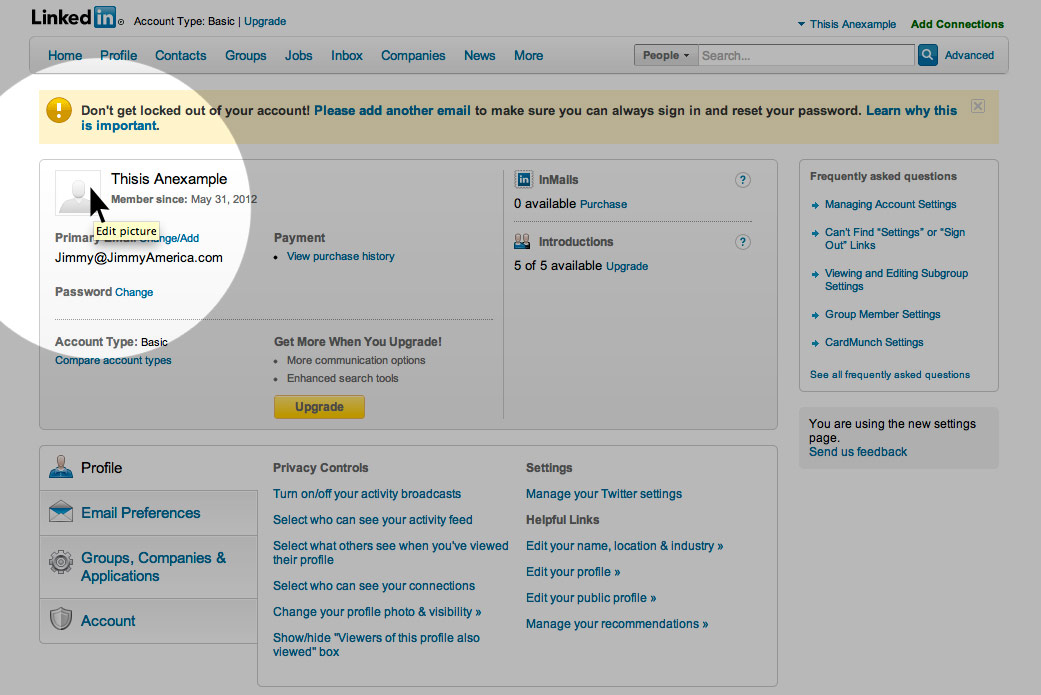
2. That will bring you to this page. There is a square that is obviously supposed to have a profile photo in it. If it doesn’t then it will have this place holder image. If instead of the place holder there is a photo of you then you may have already done this. Click on the placeholder image, this will take you to the photo upload page.
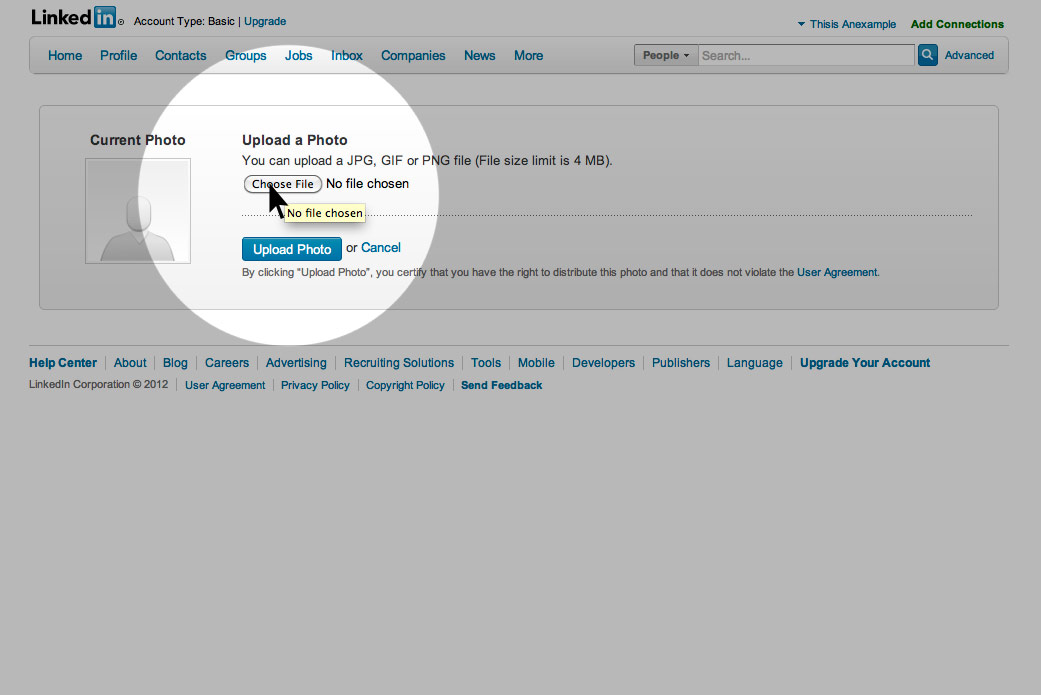
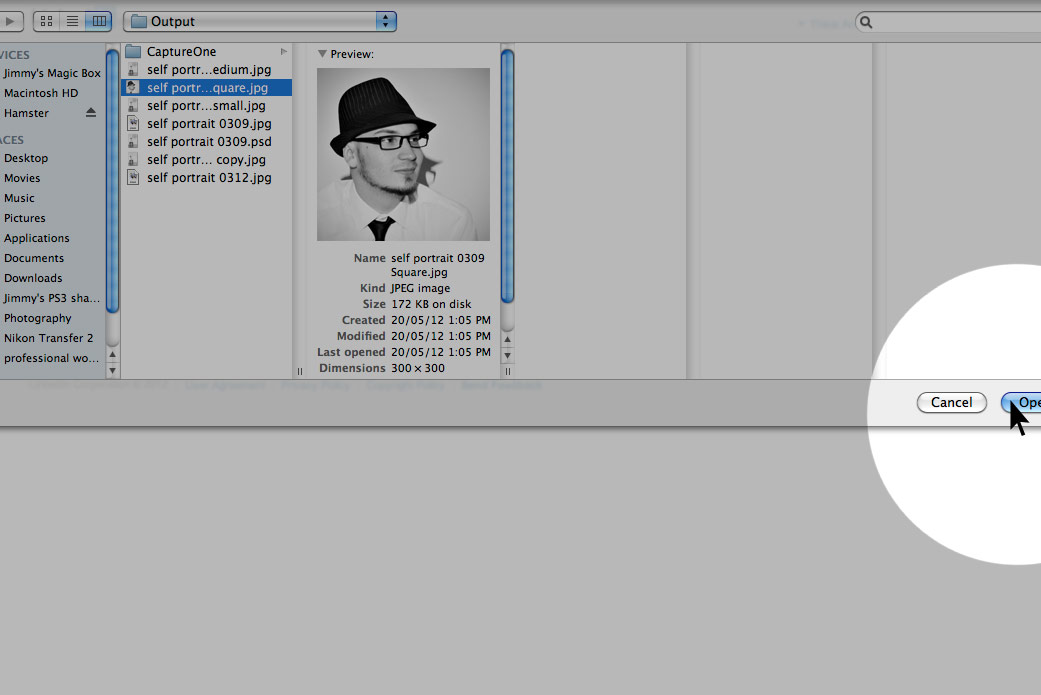
3. Clicking the Choose File button will activate a pop-up browsing window of the files on your computer. Don’t worry if yours doesn’t look exactly like mine, I’m using a Mac computer.
4. Locate the file you would like to use for your profile picture. LinkedIn only allows three types of files:
- JPG
- GIF
- PNG
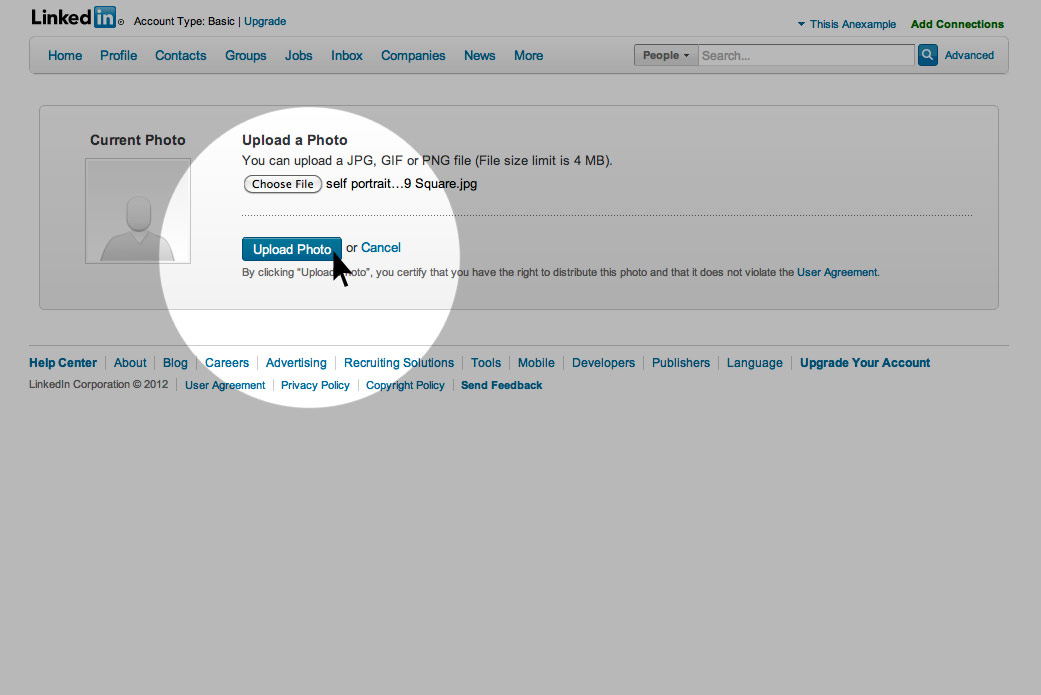
5. Once you have found the photo you are most proud of, click OPEN or hit ENTER to select it, then click Upload Photo.
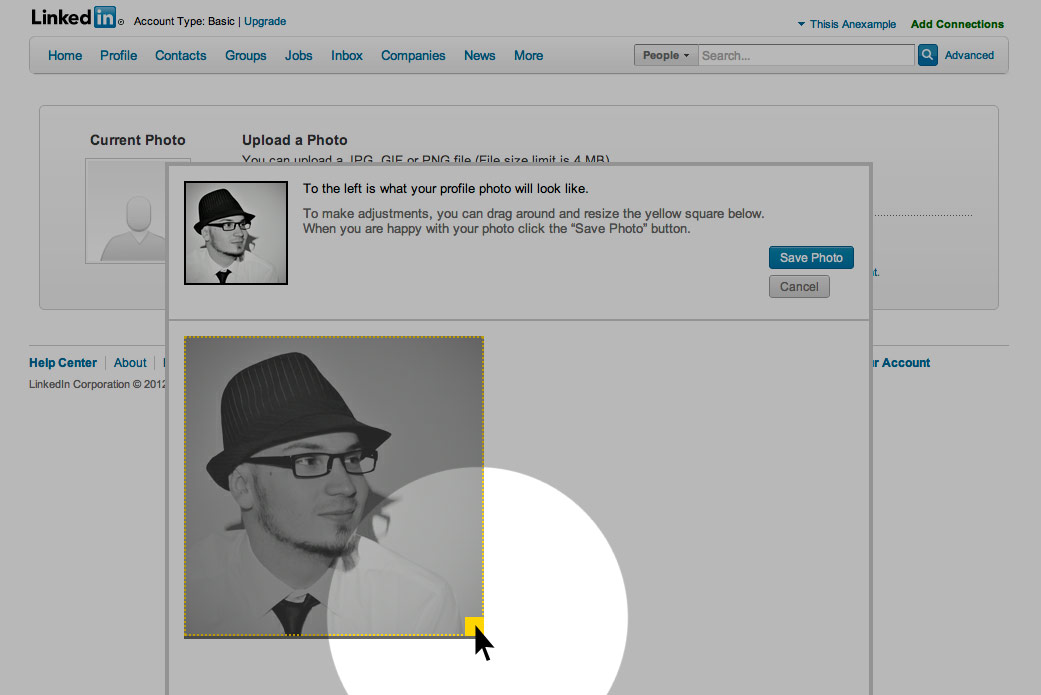
6. Once you click Upload Photo it will bring up this screen which allows you to crop down your photo by grabbing the yellow square in the bottom right of your photo and dragging it to the top left. You should see a live preview of what your final photo will look like just above this.
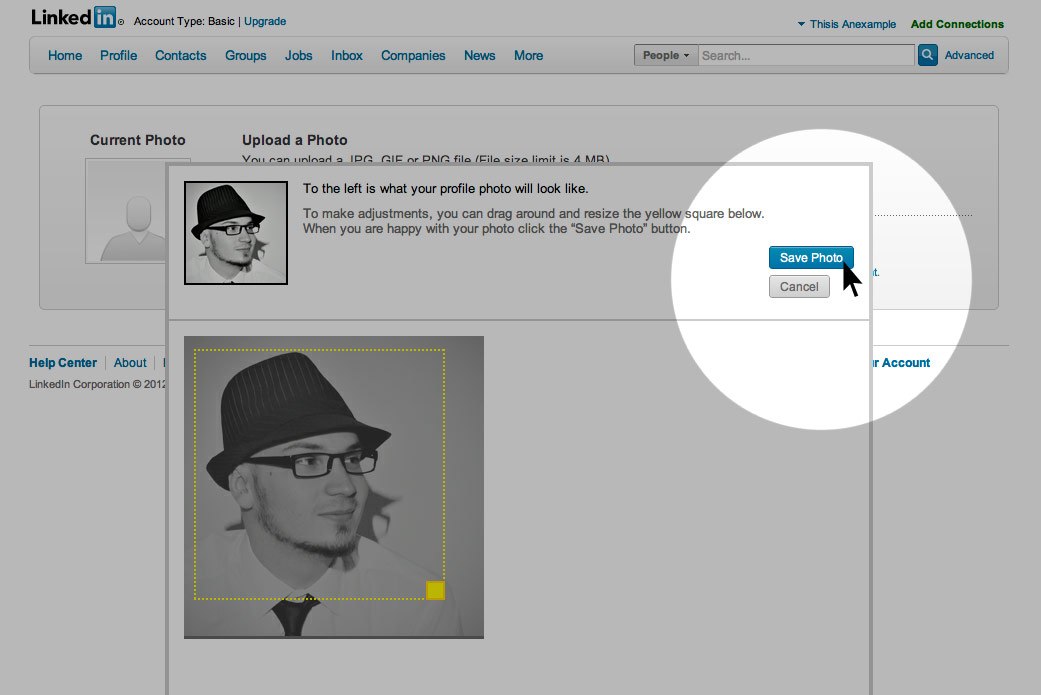
7. Once you’re happy with how it looks hit the Save Photo button…
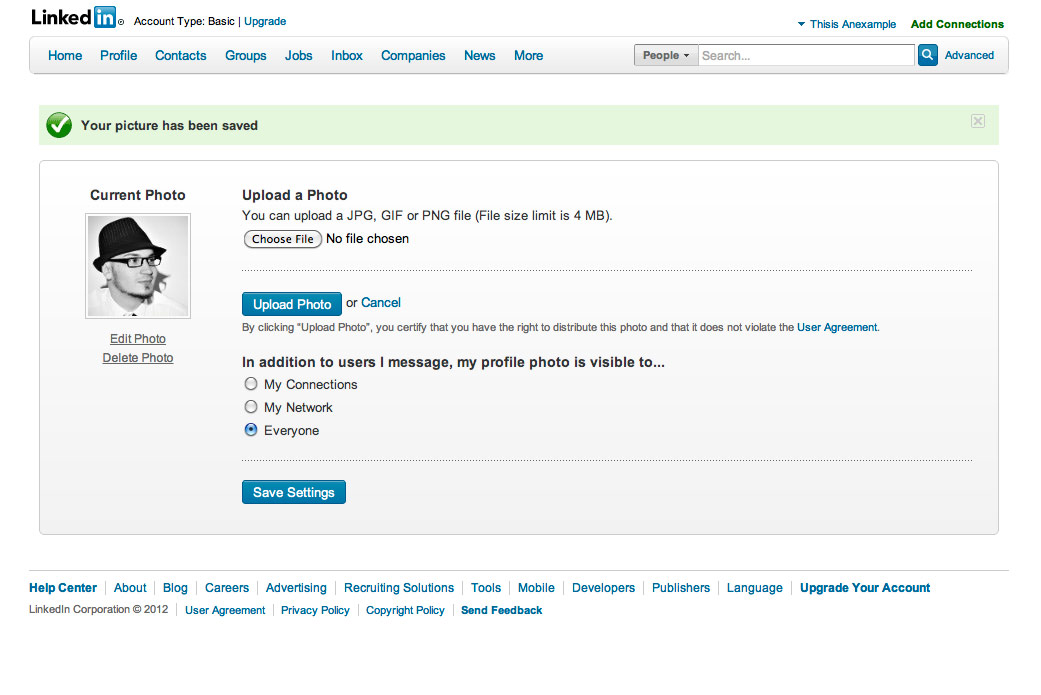
8…and that should bring you to this screen! This confirms that your image has been successfully uploaded and is now active.
Of course all of this is a bit pointless if you don’t have a professional looking image to upload in the first place! After all, first impressions count and your profile image is the first thing your potential clients, employees or business partners are going to see. I know that LinkedIn is technically social media but leave that great shot of you from that party last year where your hair looked just right and your skin was great for facebook and upload something that says “you want my business”. If you don’t have a photo that says that then you need to contact me. I’ll take a photo of you that not only says you mean business, but screams it from the roof tops.
If you’re on LinkedIn then you can view and add my profile HERE.

